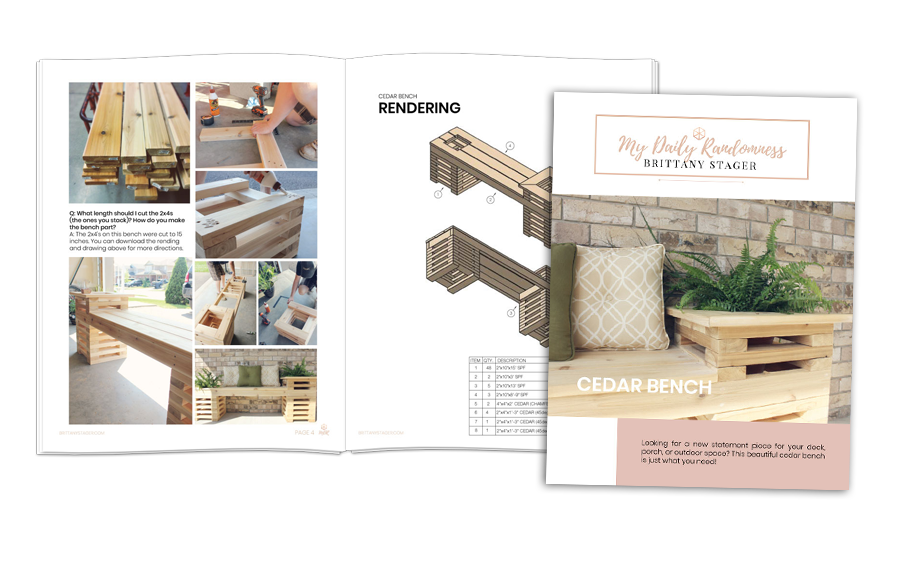
Cedar Planter Bench:

Drawing and Rendering

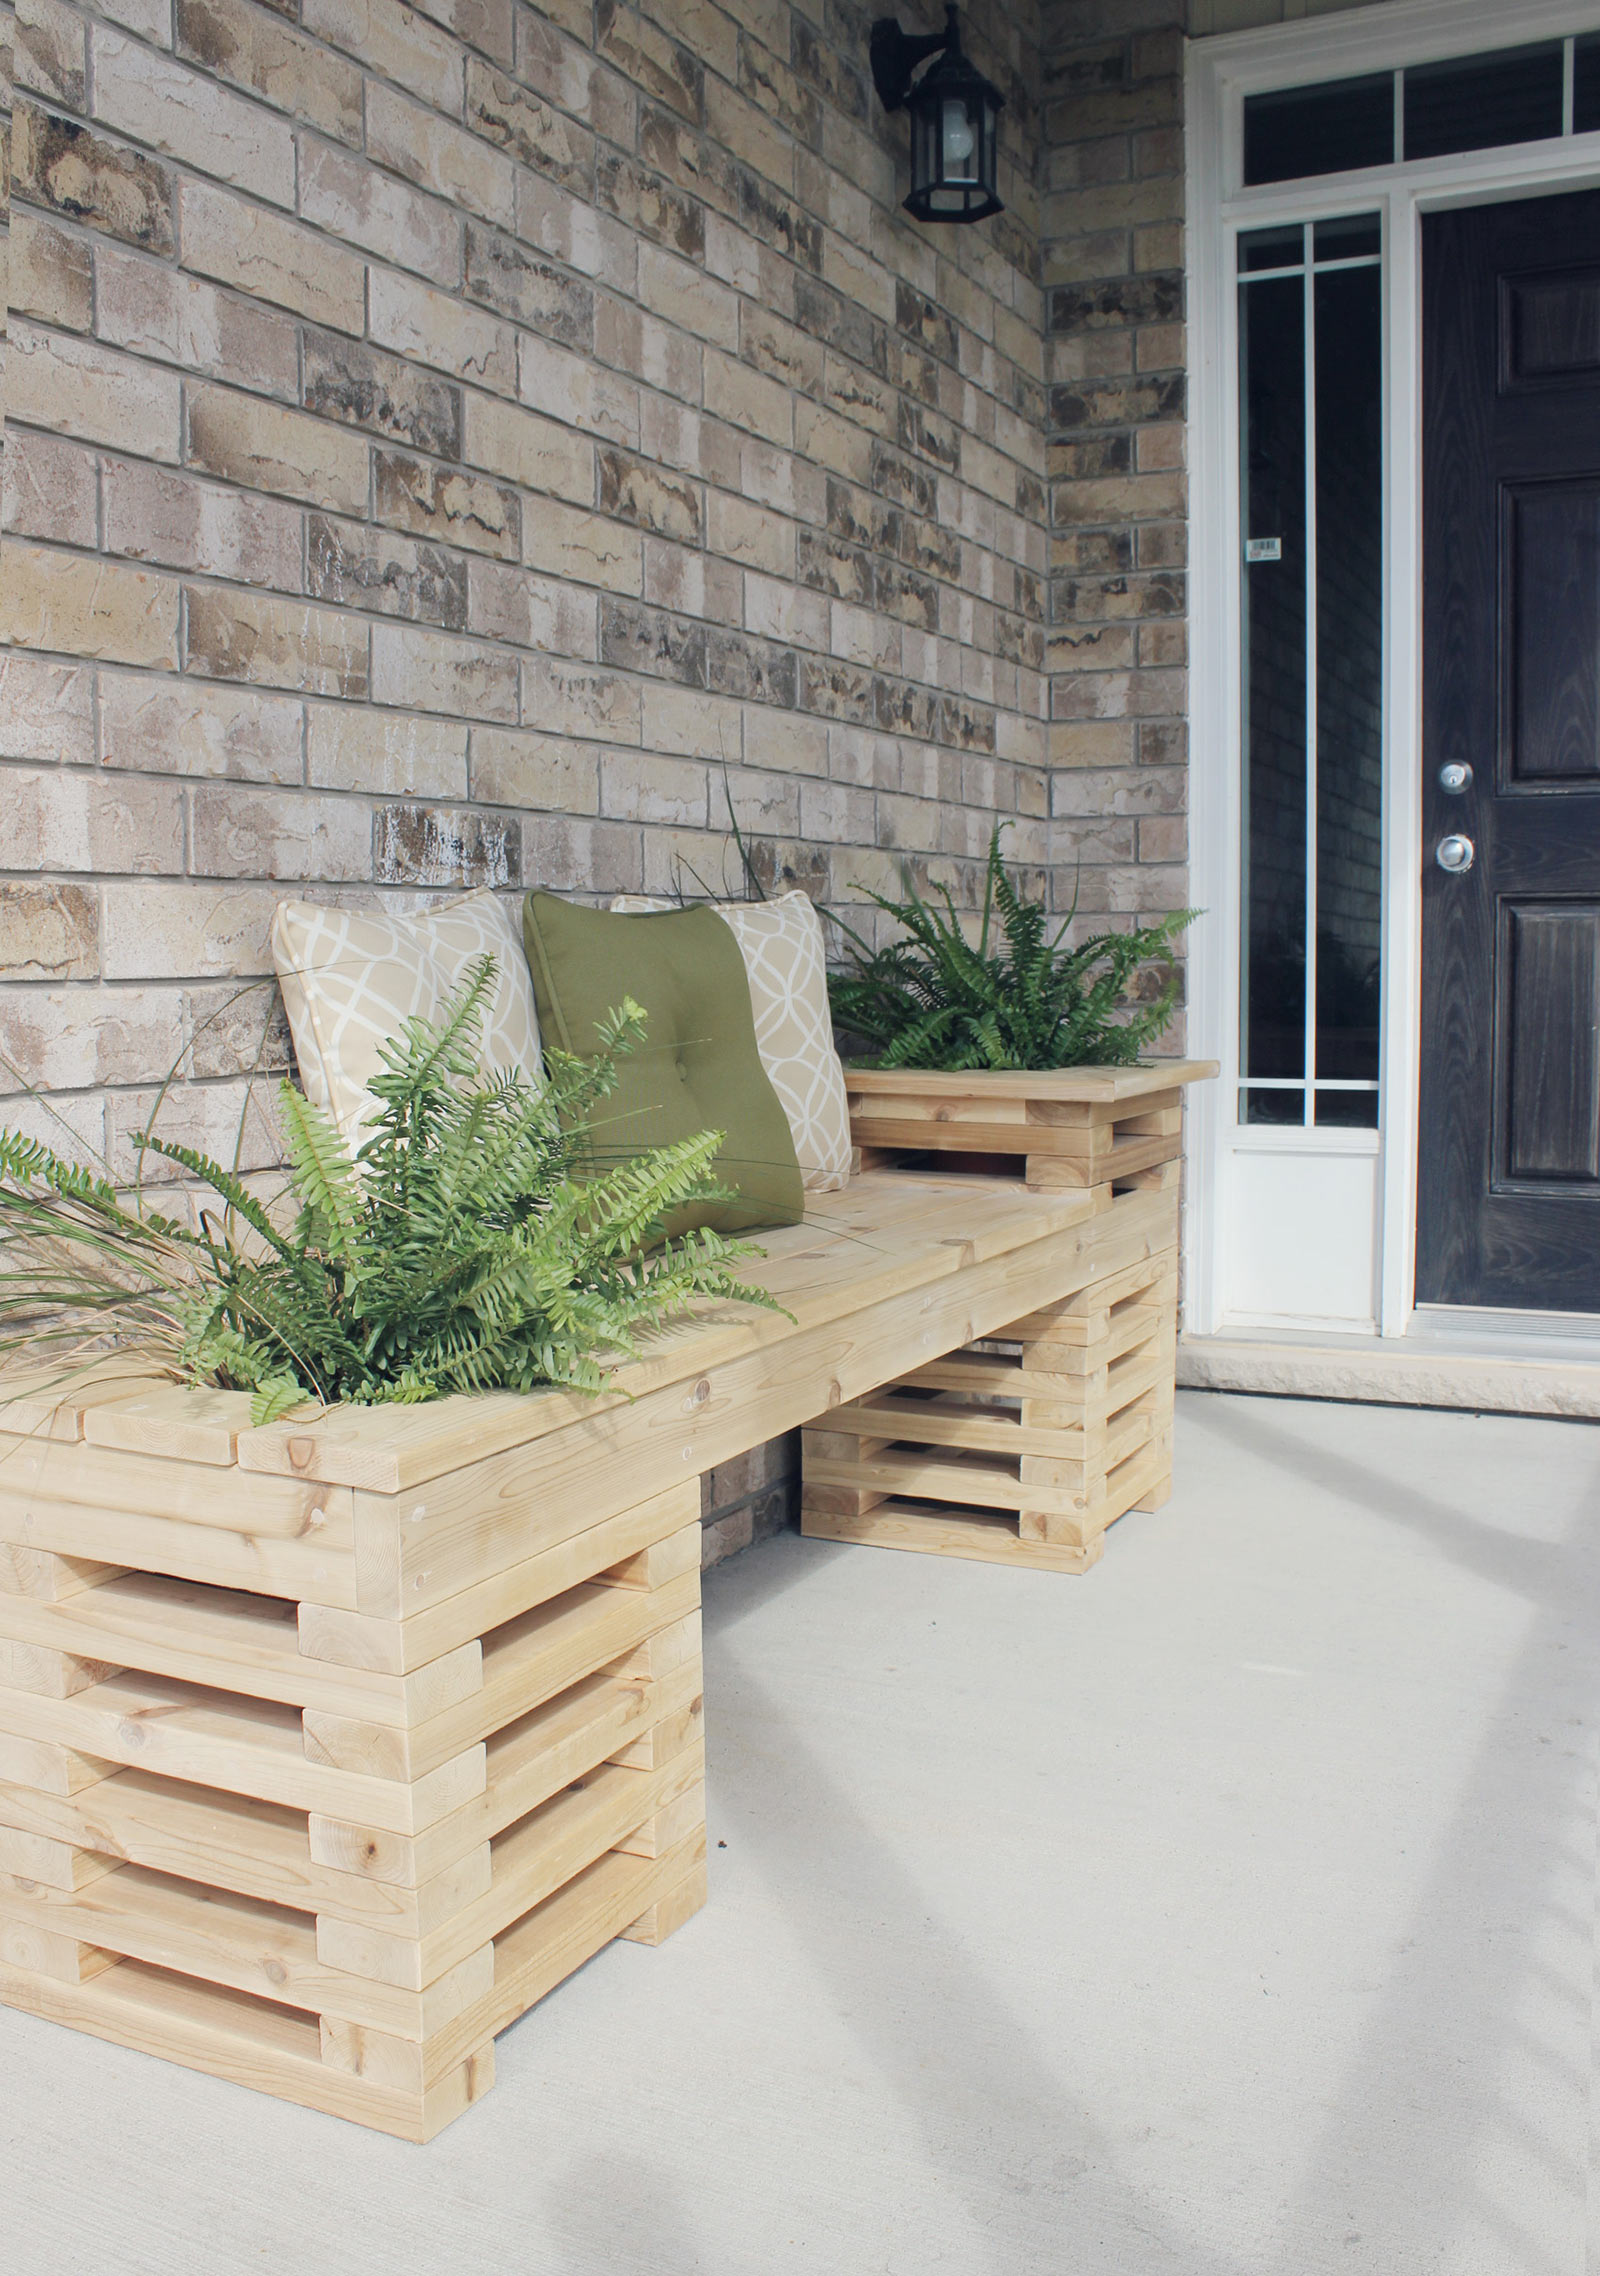
Looking for a new statement piece for your deck, porch, or outdoor space? This beautiful cedar bench is just what you need!

Form and function come together beautifully in this Cedar Planter Bench project. A statement piece for your front porch or backyard patio, this bench offers additional seating while also displaying planters of greenery, flowers, or even herbs.

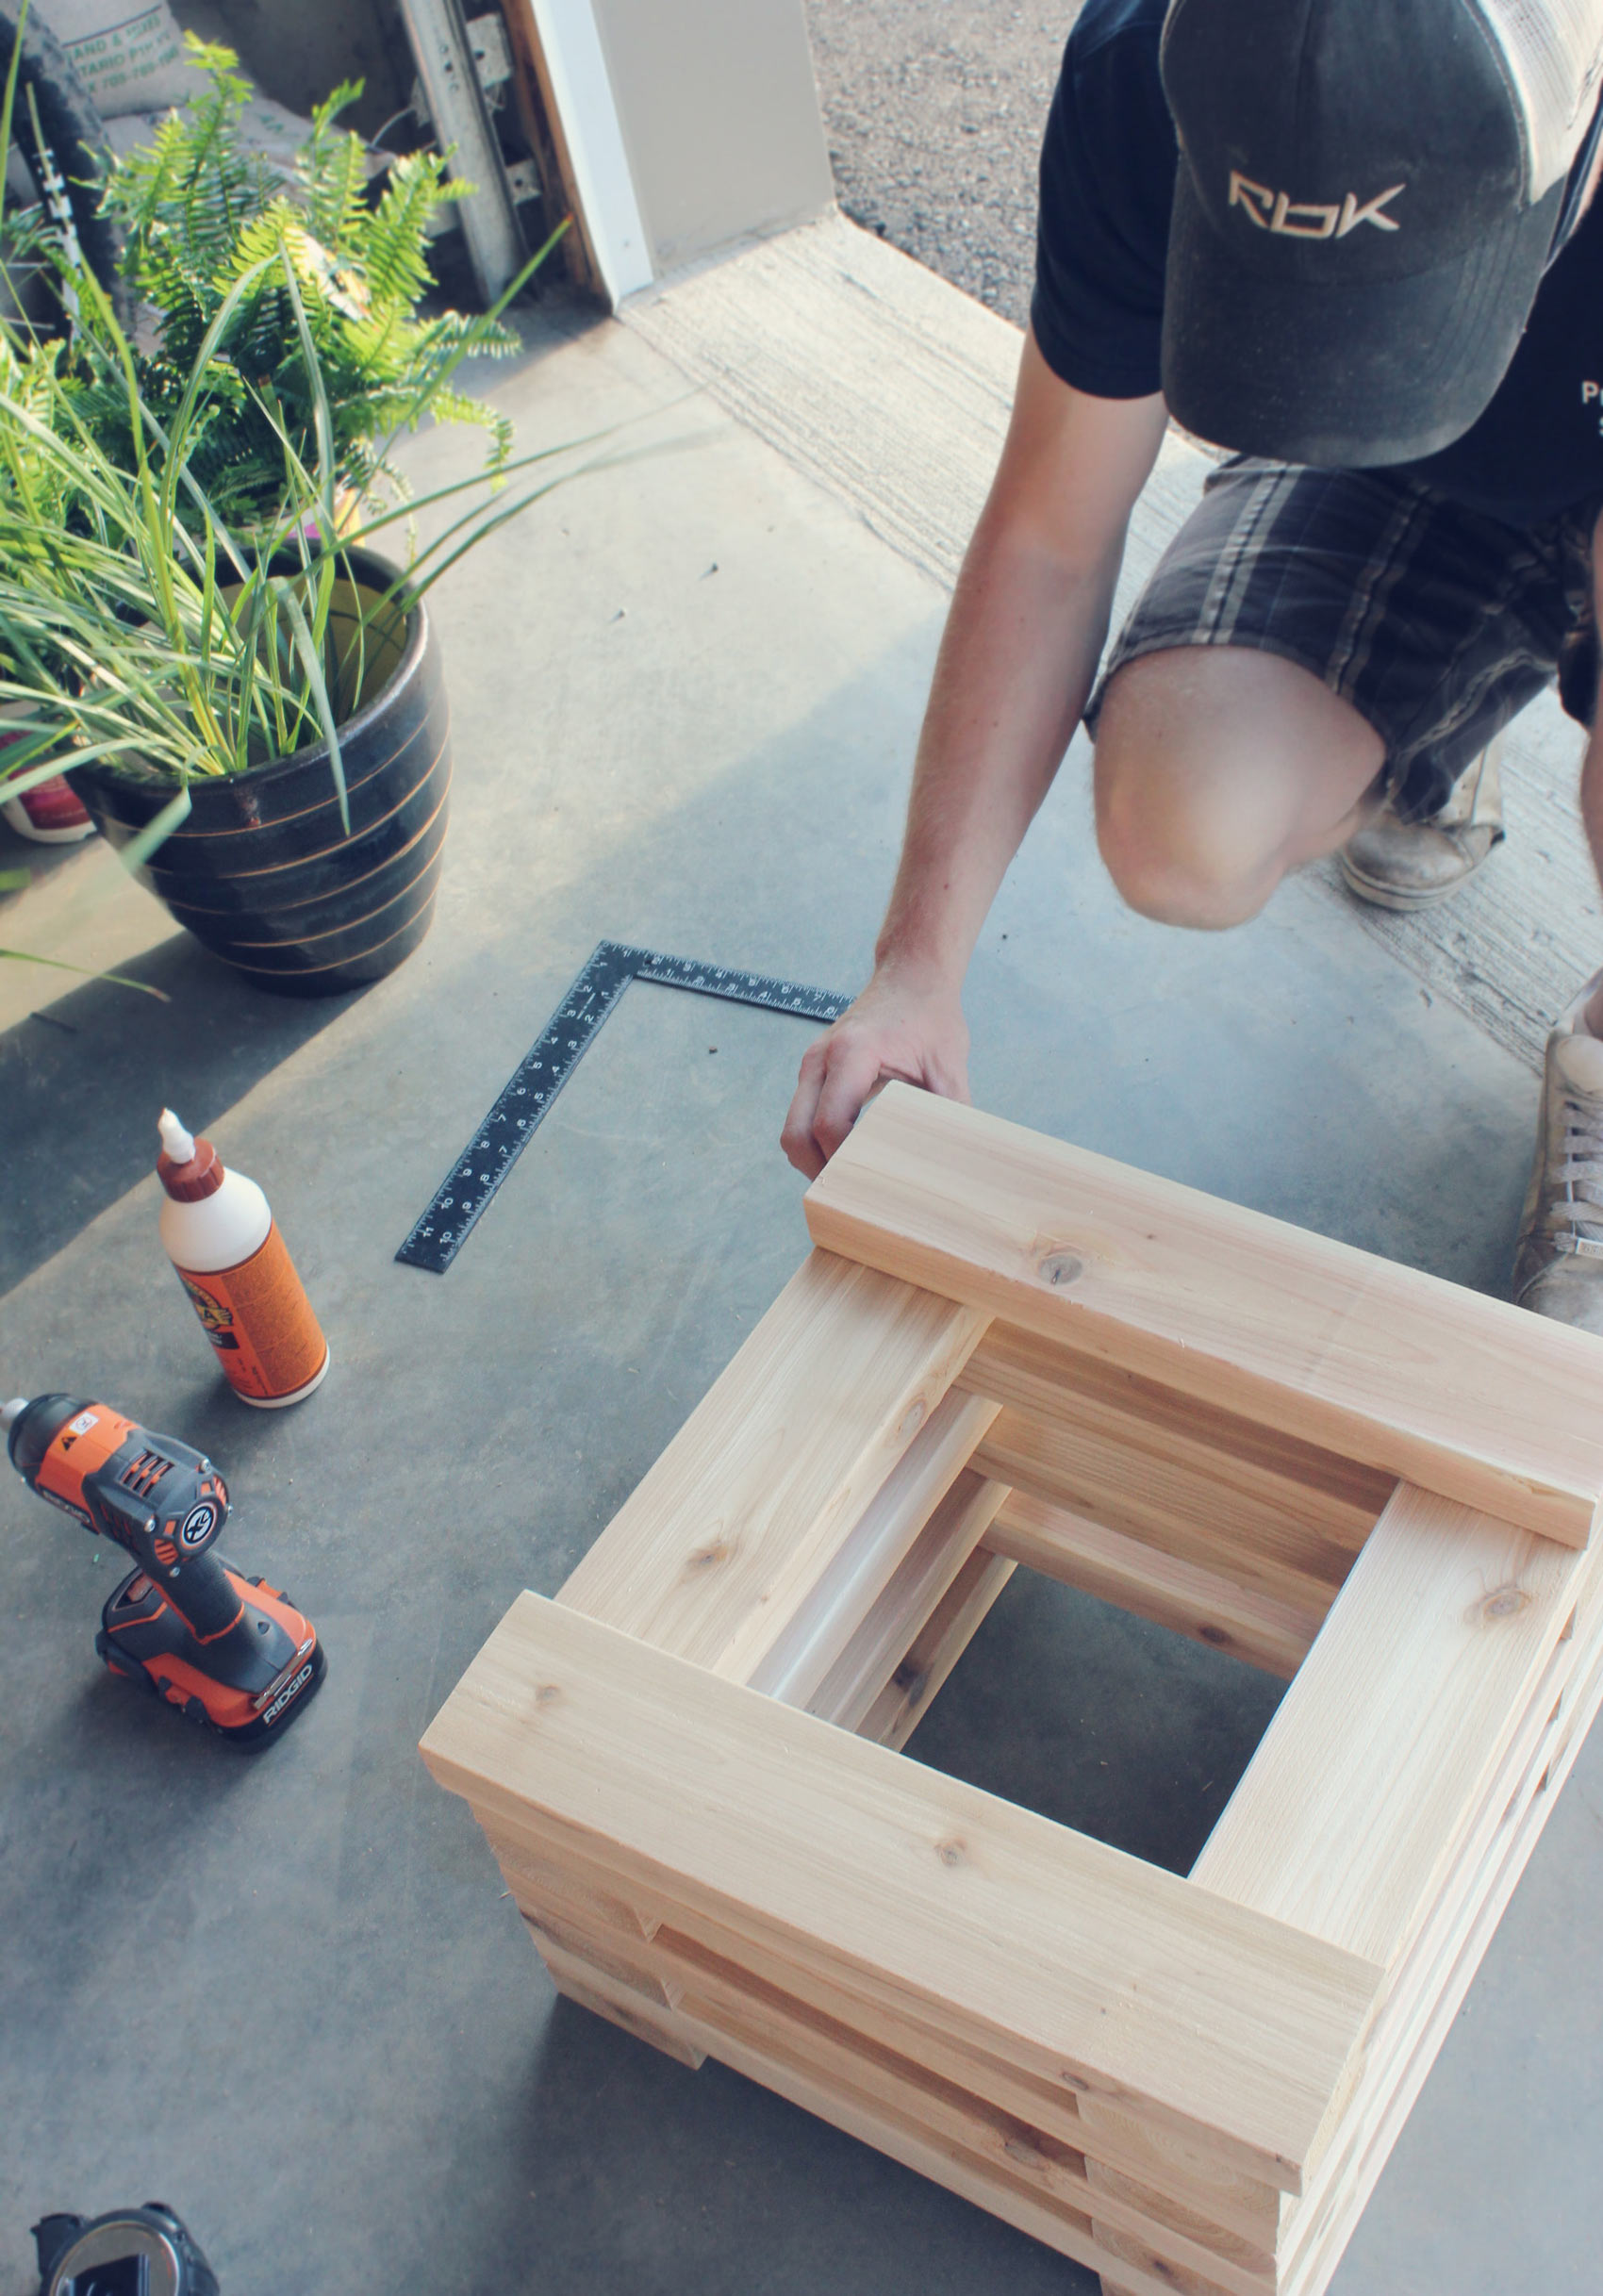
In this e-book, you will find the plans I used for my personal cedar planter bench.

PURCHASE PLANS

$3.99 USD

what’s included

In The PDF DOWNLOAD YOU WILL RECEIVE:
  • Pictures of the Bench
  • Material List + Cuts List
  • Engineered Drawing
  • Engineered Rendering

frequently asked questions

No, this download does not include detailed, step-by-step instructions on how to build the bench.

The PDF download for the Raised Garden Bed Plan is sent via E-Junkie (the system I use to sell the plans). It will be sent to the email that is associated with YOUR PayPal account. If you do not receive the email within 15 minutes, please check your SPAM folder, most of the time it ends up there. If you still need assistance after checking your spam folder please email me.

We secured a 2×4 in place on the inside of the planter so the planter sits on top of that. We did have a larger pot that was suspended by the edges of the planter, however, we thought it looked better having the planter “invisible.”

The 2×4’s on this bench were cut to 15 inches. You can download the rending and drawing above for more specific directions.

The planter hole on the short side of the bench was easy to cut out. Simply stage the boards as though you are attaching them and using a square tool draw a square that will accommodate a planter. Remove each board and using a jigsaw cut out the square. The middle board will obviously need to be cut right out, while the two side boards will require more of a notch type cut. When you stage the bench boards on top you’ll be able to clearly see the planter hole. At this time I advise you try inserting your planter to make sure the hole is large enough. If not, take the time to make more cuts, shaving off an inch or so as necessary. Once you’re are satisfied, attach the boards to the frame with screws.

The two stands were attached to the horizontal bench frame with screws on the inside of the frame in a slanted fashion. This is known as toenailing. It also keeps the screws hidden. 6-8 screws were used (toenailed) to attach the frame to the towers.

The climate here in Ontario, Canada is pretty much a muck of everything – humidity, rain, really hot, really cold. We have a saying here: just wait 10 minutes. Sometimes you can experience, what feels like, all our seasons in one day. That said, I have had the bench out on our front porch for almost a year now – through sun, wind, rain, and a very cold winter, and it has done just fine. Cedar tends to stand up to weather better!

I’m happy to answer any questions you may have. Please feel free to email me via my contact form here.